Friday, June 3, 2016

Machine Used to repair Chair

In my previous blog i blogged about a stool repair. In this blog i will be showing a machine that we used to help complete our repair. The machine is called Drill Press.

Q:What is a Drill Press

Osirirs: A drill press is a fitted tool used with different attachments to cut in a f ix position.

Q: What are the different components of this Drill Press?

Osiris: The first component is called the Quill. This is used to lower the Drill chuck in order to cut.

Q:What is a drill chuck?

Osiris:That piece right there is the drill chuck. In order to use the chuck you must place the point inside the drill chuck and lock it with the chuck key.

Q:where are the Electrical Controls?

Osiris: The controls are on the orange box on the left side of the machine it has a start and stop button to operate the tools.

Q what is that switch next to the electrical controls?

Osiris: This switch is called the fail safe if this plug is not connect the machine the drill press will never work it was made for safety reasons.

Q: What do you lay your equipment on when you are about to cut?
Osiris: This is the table we used to place what we cut onto for it to be stable and me also clamp it down to hold it steady.
Q:Do you place anything ontop of the table?
Osiris: that would on the table we used for support so we dont damage the table.
                                                                       

                                                                              Q:What did you cut?
                                                                           
Osiris:We Cut the Aluminum we need the edges to be half a circle so we used the drill press to cut the holes.

Q:How do you remove the point from the Chuck?
Osiris:To remove the point You Insert the Chuck Key and turn it in order to release or tighten. the cutting point.

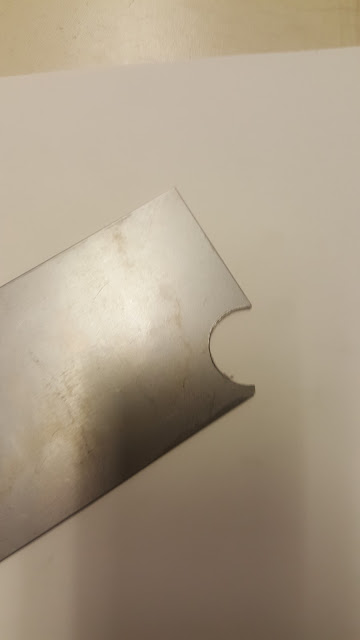
Q:Can you show us the finished metal that you cut?
Pic:
O: This is one of the side that we cut with the drill press and i really liked the out come qith the machine.

Wednesday, January 27, 2016

Stool Repair

In this portion of Mr.G class some classmates and I are taking up a challenge to fix a stool that has broken.

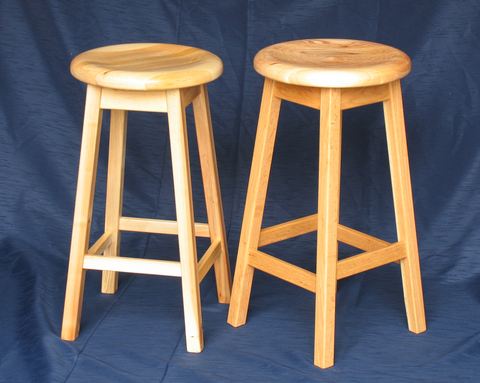
Q: What is a stool?
Pic
Osiris: a stool is used for people to sit and relax it has a ring on almost at the bottom for people to lay thier feet on.

Q:what are you going to fix on the stool?
Pic
Osiris: In my situation i am going to be fixing a ring around the chair that holds it in place and used for support to the legs.

Q: how do you plan on doing that?
pic:
Osiris: well first i need to meausre the lengths of the legs to correctly make a right fit-ring for the chair.

Q: How did you measure the ring?
pic:
Osiris: I used A ruler and some paper. the ruler was used to measure leg to leg. the paper was used to make a prototype to ensure a good fit before making it out of metal.

Q: After the prototype what did you do?
pic:
Osiris: after we completed he prototype we made the ring out of cardboard to make shure we had the correct measurements before moving on to the last step.

Q:Did you make a schematic?
Pic
Osiris: Yes indeed that an important aspect of the project. the schematic is used to have a front,side, and back view of the ring we made and it also contains the measurements.

Q:Did you guys use a specific tool for the round edges?
Pic
Osiris: yes we used something called a Kaliper it is used for measuring the radius or diameter of any round figure.

Q:

Stool Repair

Friday, November 13, 2015

Penny battery

Q:what is a penny battery


Osiris: a penny battery is an alternative power source we could use to power small items like for examples an Led or a small calculator.


Q:What materials are needed?


Osiris: there are 2 way of approaching this.first way is using  penny's after 1872, you will need some cardboard, sandpaper, vinegar and salt.the second method is using penny's that are before 1872 because its fully copper, also need zinc washers and salt and vinegar also using alligator  clips.

Q:How do start?


Osiris: the first overall step is to build  schematic which is basically a drawing to show how you plan on doing your battery.


Q:How do we Put it together?


Osiris:First what you will need to do is cut pieces of cardboard that fit the penny,after you cut about 8 pieces of cardboard you will need to soak them in the solution of vinegar and salt. In my case I used zinc washer and full copper pennies.(much easier)


Q:Whats next?


Osiris: Then you could begin to stack them together   first place a zinc washer the a piece of cardboard and finally a penny on top. Repeat this process until you stack 8 or 9 zinc,cardboard, and washers.


Q: Whats the final Step?


Osiris: At this point you could either test this two ways one is using a multi-meter and you could also use a Led to test it.


Q:How do we test it?


Osiris: Using a Led light you could see if what you have done works. the way to test it is first note that the top of the Battery is a penny which is the positive side and the bottom which is zinc is the negative side.Using the Led Light use the longer side to place it on the positive side and the shorter side is negative. When you connect it, should turn on.


Q:How can we add more Voltage?


Osiris:Easy, all you have to do is make another battery and connect it in series with the first one it should increase, double the voltage. and it should give you the power you need.


Q: can we make it turn on and off?


Osiris: yes here is a simple way of adding a switch and you will need is a few pieces of copper wire and a switch. the simplest way to use alligator clips attach on end to the positive leg of the led and to the switch. to the other use the wire connect to the switch and the negative side of the led on the zinc to make it switch on and off.


Q: how can we go public about this?


Osiris: there are a lot of ways you could make a blog about it. also you could share it with some people at your near school or do it for a science experiment.